I have a cat. Along with usual things that come with having a pet, such as accepting you’ll always have a non-trivial amount of pet hair on you, living with a cat means putting up with snags. My cat has snagged every imaginable piece of clothing: sweaters, ties, scarves, pajamas, silk dressing gowns (yes, I own a silk dressing gown), and even sport coats. On StyleForum, there’s a running joke about hopsack, which is a kind of chunky, plain weave. I can tell you: hopsack is great for navy sport coats, but it will attract the claws of a playful cat.
Since declawing is evil and I don’t always have time to trim my cat’s nails, I live with snagged clothing. The bad news is that it’s hard to fix a snag. To do it, you have to use a blunt needle and tease the material back into place. Pull the thread through to the next stitch, and then the next, and then the next –- dispersing the excess material evenly across the row. You want to work both sides of the snag so that everything looks natural. This easier on large-gauge knits, but it’s possible with fine ones as well.
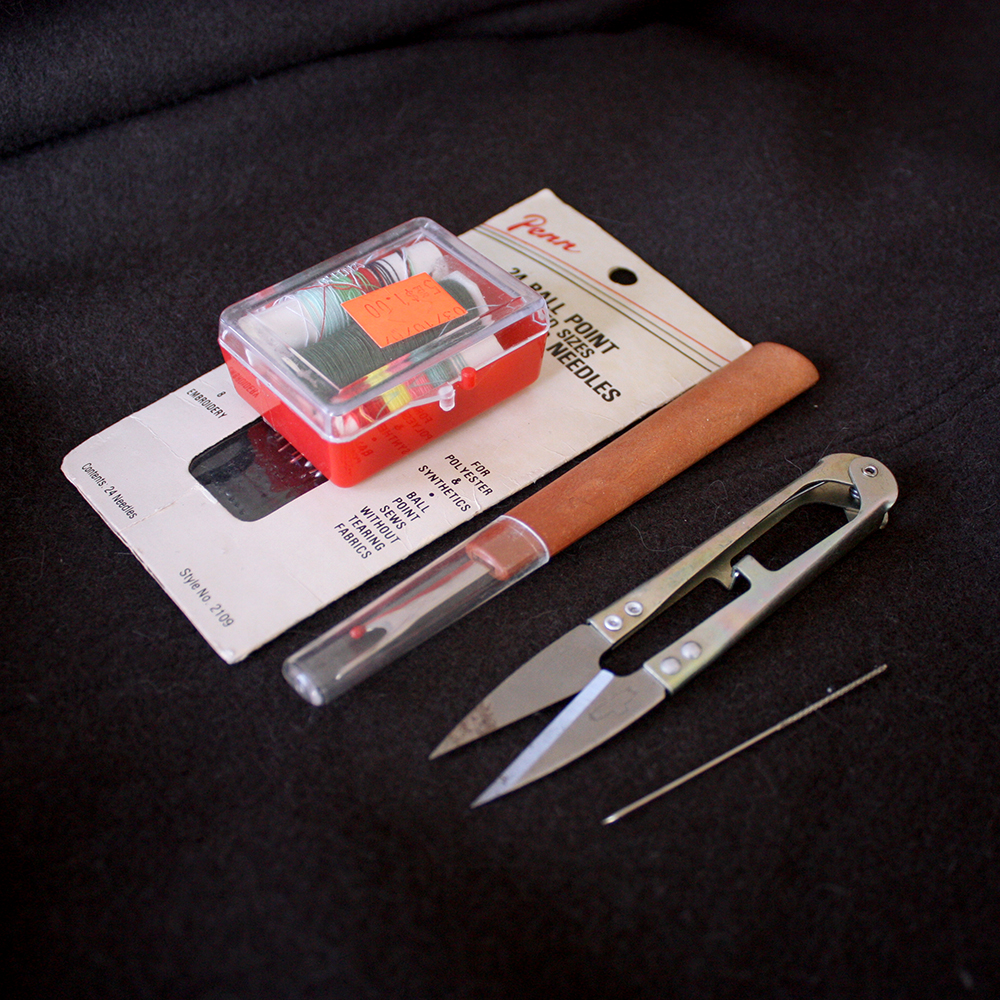
The good news is that, while it’s challenging to fix a snag, it’s pretty easy to hide one. All you need is the Snag Nab It. This handy little tool should be part of any basic home repair kit, which includes sewing needles and multiple spools of thread (in different colors), a pair of thread snippers, and a seam ripper (all pictured above). If you search around, you can find upgraded thread snippers from Japan. They look beautiful but don’t perform any better than the more common varieties you can find at your local sewing supply store.
Back to the Snag Nab It. Made by the sewing supply company Dritz, the Snag Nab It looks like a 2.5” sewing needle with a rough end. Use this to pull the loose thread to the other side. Remember: You never want to cut a snag, as then you’ll have two loose threads that can unravel. Instead, you want to pull the snag through to the backside of the fabric, where it’ll remain hidden.
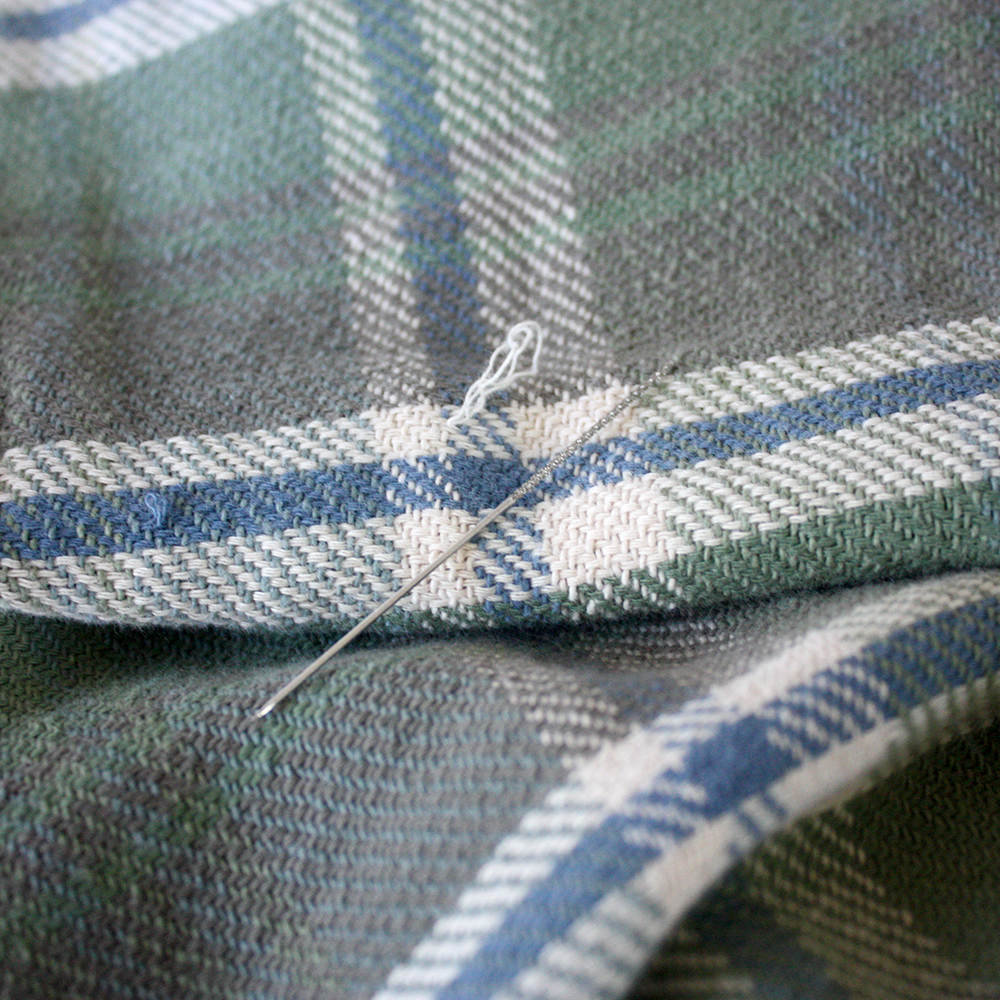
You can see how I’ve done this with a recently snagged RRL flannel. To do this, you push the needle through the snag. The rough end of the needle will catch the loose thread and pull it through to the other side.

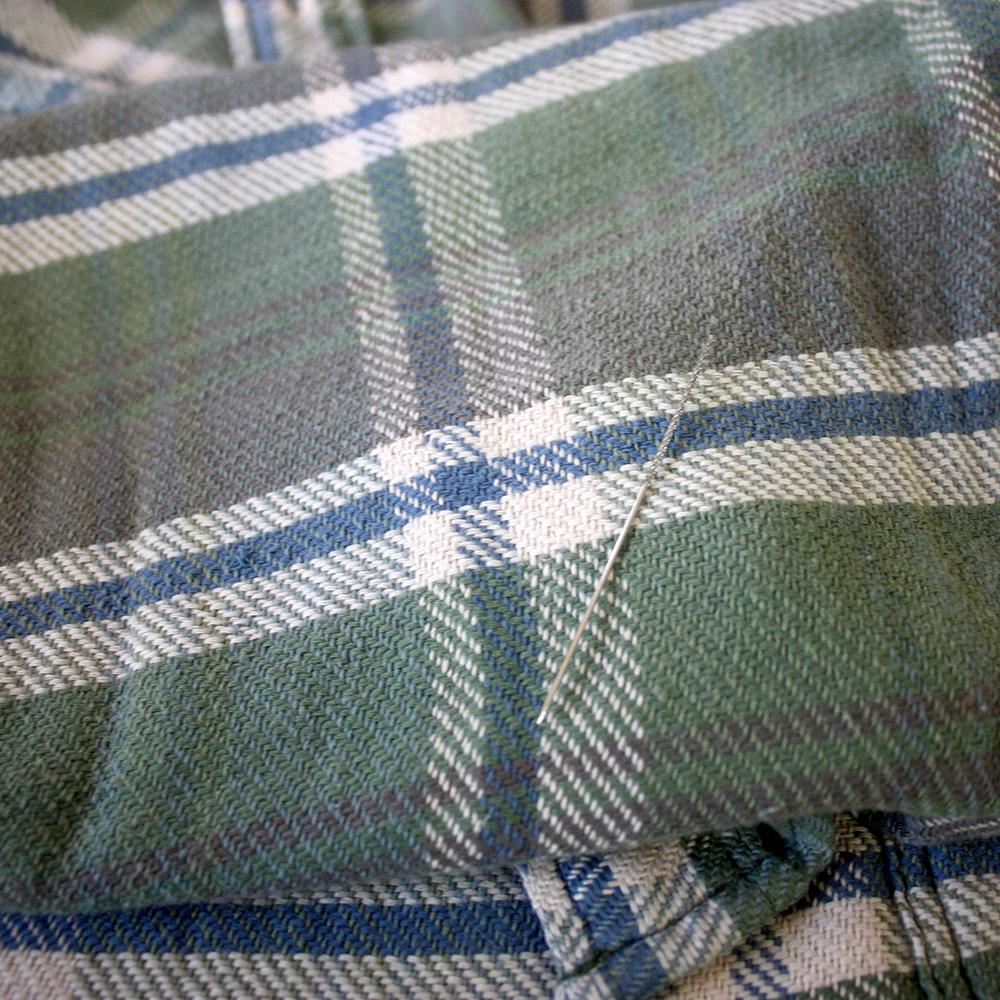
Here’s how it looks on the backside of the fabric.
The one downside of the Snag Nab It is that, since one end is rough, it can create new snag as you pull things through. I’ve used the Snag Nab It on knits and wovens, but if your material is particularly delicate, you may want to try another method.
For very fine materials, such as single-ply cashmere or delicate silks, use a large sewing needle with a big eye. You can pull the snag through the eye using a tool known as a needle threader. Once the snag is through the eye, you can pull it to the backside of the fabric by pushing the needle through. Dritz also has a latch repair tool that essentially does the same thing.
Alternatively, you can thread the needle with any old thread — like a thread from a random spool — then push the needle through to the other side. The friction caused by pushing new material through should drag the snag with it. It may take a few passes, but I’ve fixed delicate silk ties this way. Remember, for something very delicate, go slowly. It’s better to work the area a few times, rather than worsen the damage.
For more difficult jobs, send your clothes to a professional. I’ve had good experiences sending sport coats to Best Weaving & Mending, and sending knitwear to The French American Reweaving Company. In Chicago, Without a Trace is known to do good work. All three of these companies take mail-ins.